You’ve taken the first step! Strength training for beginners can seem daunting at first – but look no further, we’ve created the Ultimate Guide.
Now, I want to stress that this guide is pretty exhaustive…
I’m talking 10,000+ words exhaustive…
It culminates almost every question I’ve ever been asked, as well as all of the information deemed relevant to start out with as a beginner.
There is a contents page and sections where you can find specific elements you’re looking for – but if you want we can send you the article as a guide for you to read later.
Don’t have time to read The Ultimate Guide right now?
No prob. Let me send you a copy so you can read it when it’s convenient for you.
Just let me know where to send it (takes 5 seconds):
Note - you'll also receive our exclusive weekly newsletter to help you on your Journey to Strong, once you've received your guide!
Don't worry, there's no spam and you're free to unsubscribe at any time.
A Guide for All
So, sit down grab a coffee and, whether it’s the first time looking at a barbell or you’re already pretty experienced and just want to brush up on the basics – let’s dive in.
CHAPTER ONE – Technique and Terminology
Glossary of Terms
Now, no doubt you have been in the gym setting (or spoken to anyone who is a bit of a fitness fanatic) and you will have been bombarded with a variety of words that seem to make absolutely no sense.
“Yeah bro, I hit my previous 1RM for 4 sets of 3 reps, with reverse mini bands. Didn’t hit my fatigue point until after the lactate part of my WOD” – Random Gym Goer.
As with most industries and sectors, they have terms that are used to describe things they find familiar, but unfortunately, this creates a barrier to entry for most people.
The correct terminology also provides the beginning of the framework for dispelling a lot of the myths out there.
Now I know that sounds incredibly pedantic to focus on the definitions first, but it’s important to be clear on certain topics.
As the well-known game of Chinese Whispers goes, a very small piece of misunderstanding can rapidly breed a culture of misinformation.
Think about being in a hospital. It wouldn’t really instil any faith if the hospital staff were using terms interchangeably based off their own preference. It should be clear and concise communication between everyone, that way we avoid any confusion.
TERM USED | FANCY SCIENTIFIC DEFINITION | EASIEST WAY TO THINK ABOUT IT |
|---|---|---|
1RM - 1 Repetition Maximum | The maximal weight in which an individual can concentrically lift. | “You lifted weight A, but couldn’t lift weight B, which was slightly heavier. A is your max” |
Strength | The ability to produce force with a magnitude, rate and direction. | “How much do you lift bro?” |
Concentric | The action of a muscle shortening under tension. | “What weight can you lift up?” |
Eccentric | The action of a muscle lengthening under tension. | “What weight can you lower down under control?” |
Isometric | The action of a muscle generating tension with minimal to no change in length. | “How hard can you try and lift something that can’t be lifted?” |
Prime Mover | The primary muscle(s) involved in generating force within a movement. | “The main muscle(s) that lifts the weight” |
Secondary Muscle | The secondary muscle that assists in force production both direct and indirectly. | “The muscles that help lift the weight” |
Synergist | The muscles that regulate stability at each joint throughout movement.“The muscles that help control each joint and keep you safe” | “The muscles that help control each joint and keep you safe” |
Muscle | A biological tissue, comprised of bundles of sarcomeres in series that are neurologically stimulated to produce muscular contraction. | “The beach is that way” |
Tendon | A biological tissue that connects muscle to bone, transferring the force generated by muscle, pulling on bone to create movement. | “The stiff bit underneath your knee cap or your ‘funny bone’ that feels weird when you bang it” |
Repetition | One complete cycle of a movement pattern. | "How many of them?" |
Set | A group of repetitions separated by a rest interval | "How many times?" |
Neural | Influence of nervous system on the body | "Electricity within the body" |
Technique Comes First
There is a good reason why this is number one on the list. Safe and effective technique is paramount for strength training for beginners.
It is the key defining factor and will literally…
…Make or break you.
From optimal mechanics and conserving energy, right through to injury risk, how you move when you perform exercises is the cornerstone of everything you do. And will be the key defining factor for all forms of progression you will make.
Researchers investigating the differences between competitive collegiate and novice athletes found…
To avoid injury and to achieve optimum results in powerlifting, lifting technique must be optimized (23).
To add to that… Research by Rossi et al. (31) states that…
Along with strength, success in weightlifting depends on the skill of the lifter (31).
Strength Goes WAY Beyond Just Muscle
Arguably the biggest misconception people tend to have when it comes to strength training for beginners is that muscle equals strength.
However, muscle should be rephrased as potential strength. It only gives you the tools to build a bigger deadlift. But it doesn’t give you it straight away.

The other components – such as connective tissue strength, your nervous system efficiency and skill/technique are the true keys.
Quality vs. Quantity
Keeping the importance of technique in mind, the adage of quality over quantity couldn’t be truer when it comes to strength training for beginners.
We always, I repeat…ALWAYS prioritize the quality of your movement and technique over simply the “amount of work you do”.
This is the primary reason people get hurt during any form of exercise, not just lifting weights. They simply aren’t aware that there even is a “technique” to the way we move.
This is where the help of a professional is highly recommended, even if it is just to check you are doing things right.
You can use this resource and others to continue your journey to strong, but if you’re a complete beginner it may be worth getting a coaches’ eye on the job to check you are executing the techniques safely.
Or…another way I recommend, is to simply video yourself performing a few of the exercises and review your technique.
After all, we often learn best through making mistakes, figuring out where we went wrong and then correcting it ourselves (with the help of others).
Movement vs. Muscle
Although muscles are important, and their stimulation is a key to generating motion, it is not the only factor that results in safe and effective technique when lifting weights.
And ultimately, the way we move, determines our quality of life, as well as the way we look.
Focusing primarily on technique in strength training for beginners is the key to progression.
4 Pillars of Technique
Fatigue
“Fatigue makes cowards of us all” – Vince Lombardi
Fatigue is defined as…
“Any reduction in the maximal capacity to generate force or power output’ (41).
Similarly to stress, fatigue could be an acute (short-term) or chronic (long-term) response; essentially it refers to when the demand during exercise, far outweighs the supply.
- Acute – can you continue to perform reps infinitely?
- Chronic – Are you recovering between training sessions?
The concept of fatigue is a very important one and is arguably the most detrimental to the way we move.
The Royal Marines acknowledge that under extreme fatigue, the average person has the mental capacity of a 5-year-old.
Combine that with our task-focused nature, in that every human is designed to prioritize moving from A to B over how you get from A to B, you can see where the complete lack of focus on technique stems from.
Urging your body for one more rep, lifting the weight from A to B (A and B, both being places that some random human decided would be touted as an exercise), your body bows down and figures out a way to get there.
And as you are pushing yourself as hard as possible, your focus shifts from the importance of maintaining proper technique and instead, shifts to the “Holy sh*t I feel like I’m going to cry”.
This tends to exacerbate any weaknesses you have in certain exercises/movements.
For example, if you are someone with incredibly poor glute/core strength and even less coordination, as your legs tire, you will naturally begin to place more stress on the medial part of your knee, a movement issue known as knee valgus (shown in the photo).
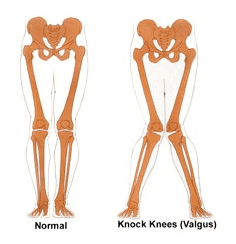
Photo Credit: https://www.drbodygadget.com/knee-valgus/
Wax On, Wax Off
Ever seen the iconic film “The Karate Kid”?
After 1000s of times repeating a seemly pointless task, suddenly, the student can learn Kung Fu rapidly.
Despite having never done any “drills” or reps or sets, for a certain time or anything like that. Although it’s wildly unrealistic to assume it would be that simple and happen that fast, the story holds quite a strong message.
Daniel San has refined the skill itself, meaning when it comes down to pushing the other factors such as the speed and developing his body, he already has cemented the foundation of his movement.
Exercise and strength training for beginners is the same.
Basically, every action performed whether writing your name or lifting a maximal deadlift, is what is called a “motor skill”.
In the same way, learning how to write your name when you were younger took time, patience and practice to improve technique, so too does executing an exercise correctly and efficiently.
To put it simply, you need to focus on the important aspects of technique and practice them consciously. You didn’t hop on a bike for the first time and start riding straight away.
Speed
"Speed is the enemy of control"
Control
This aspect of technique is relatively simple, but it should be strongly understood and carried forward into every aspect of training in strength training for beginners.
Often referred to as tempo, the “speed” of the movement is exactly that – how fast you execute the whole movement, all it’s phases and all aspects of coordination.
Imagine if you’re practising your tennis backhand.
You purely want to focus on building your technique. So, I am on the other side of the court and I throw the ball underhand towards you
Great, you can think about your position and go through the relevant steps to execute it.
Now, my second throw isn’t a throw. Instead, I get a turbo powered jet engine to fire the tennis ball from a cannon like a bullet out of the barrel of a gun.
Do you really think you’re going to have the same level of control of your own technique?

When learning a new language, what does a teacher do?
Do they talk fluently at a conversational pace and hope you just keep up with it?
No. They break it down into component parts, speaking at a tempo that you can understand and slowly increase the speed over time.
Now you would think this was obvious, but from my experience, there are three main situations in strength training for beginners where this tends to change:
- The Athletes Among Us – people that tend to have athletic backgrounds or are more athletic by nature are so fixated on moving from A to B, it’s often a fuzzy grey area in between. Meaning a squat to them, is simply dropping down and getting back up again.
- Pain – Let’s face it, short of the few sadistic individuals among us, no one craves discomfort. The clue is kind of in the name – it’s uncomfortable. Meaning part of your psyche wants out the second you reach that point. What’s one way to help get to that point? Just speed it up!
- Exercise to Music – Performing exercise to a set tempo isn’t necessarily the best thing to do. Especially for with strength training for beginners or people with limited grasp on a specific movement (e.g. those who struggle to squat). It largely depends on the individual and the music, however the speed is still influenced.
Your experience level and grasp on the movement you are performing is directly related to how fast you should be moving.
As is the same with fatigue, speed can be a factor you look to increase and use as a means of challenging yourself further down the line.
However, this should be after you have a firm grasp and consistent technique in the exercise itself – during strength training for beginners, slow and steady wins the race.
- If you’re advanced and have great technique – move as fast as you want.
- If you’re a beginner – slow down. It’s good for you and your movement.
Stability
“True stability results when presumed order and presumed disorder are balanced. A truly stable system expects the unexpected, is prepared to be disrupted and waits to be transformed” – Tom Robbins
Perform a squat.
Easy?
Now stand on one leg and simply…hold that position.
You may be surprised to see that, at least at first, you wobble all over the place like there is a minor earthquake going on beneath you.
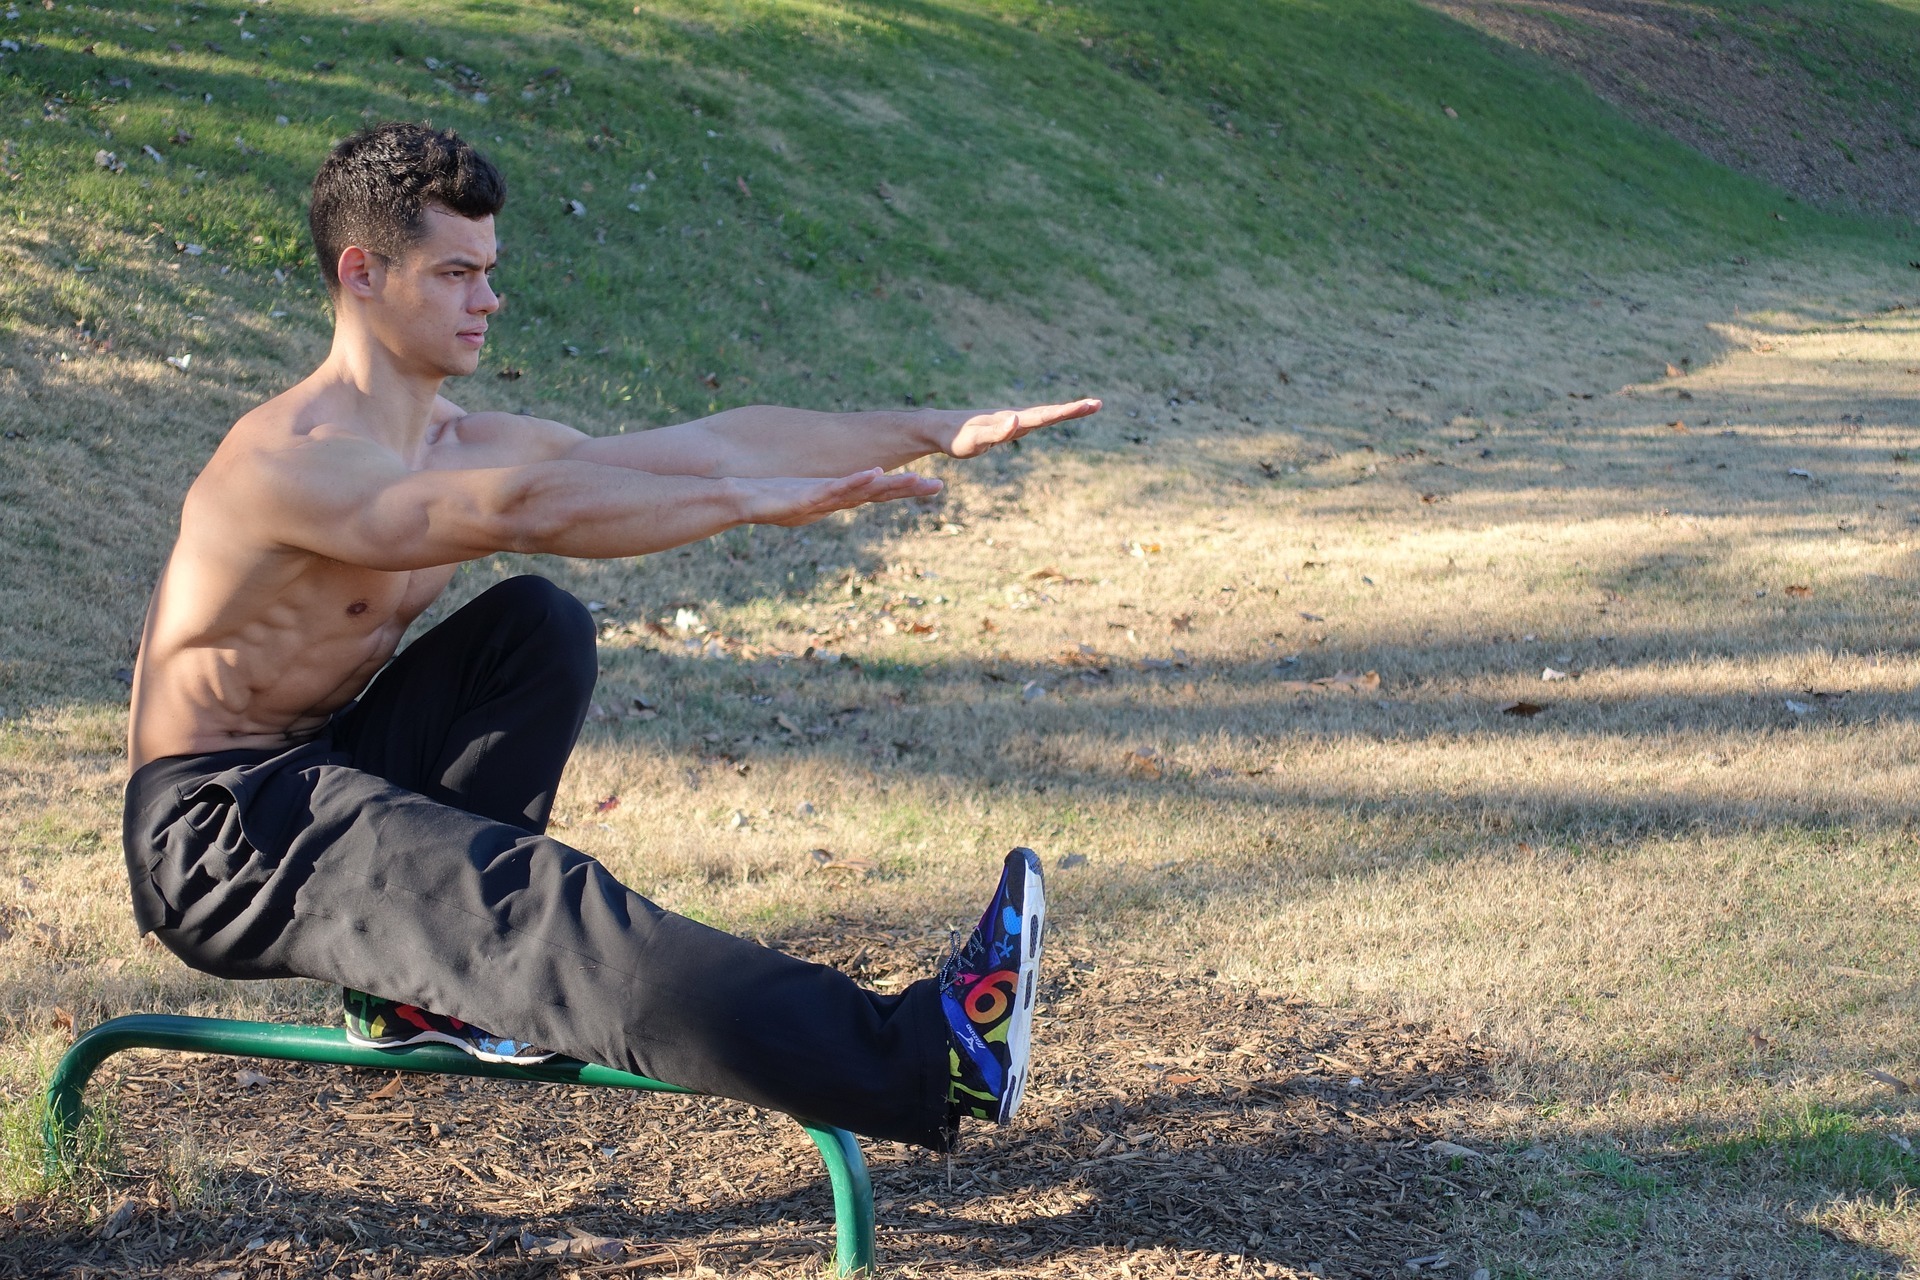
Challenging stability is a sure-fire way to improve your overall movement. This is because the body must consider several other factors such as weight distribution, the position of a load and so on, making it much harder to coordinate a movement.
Now I’m not saying you should take every movement you do and remove a limb, stand on one leg or use those god-awful wobble board things.
Whereas strength can be seen as the ability to produce force, stability can be seen as the ability to resist it. Resisting forces such as postural sway, the effect of gravity on balance and the urge for your body to compensate when performing the exercise, all refer to the stability component.
Free weights – less stability than machines.
Dumbbells – less stability than barbells.
You get the picture.
Load
"Force = mass x acceleration" - Newton's 2nd Law
And here is the obvious one. Yet ironically, it’s the one people are most afraid of and therefore avoid.
What’s the first thing people (who have never lifted before) say when you tell them about a heavyweight you have lifted?
“Oh, surely that’s not good for you/your back/your joints/your body (and so on)”
Most people assume that lifting heavyweight is going to break your technique.
And they would be right…
…to a point.
Is Lighter Better?
Now technically, lighter weights do have the potential to do less damage. That’s obvious and is just simple mathematics, the amount of force placed on the body is more or less the same as the mass on the bar multiplied by the acceleration of gravity.

However, when looking at your technique, there are two primary issues with lifting excessively light loads versus heavier ones:
- The Technique You Use with a Heavy Weight is Different to that of a Lighter One
An increase in load can sometimes promote a safer, more effective technique, provided it’s used correctly.
For a brief example, let’s take the deadlift. With strength training for beginners, people often keep the weight light, out of fear of hurting their backs.
However, as a result, they end up “squatting” the weight up, which results in them taking the bar way out in front of them and actually doing more damage.
This is largely due to the misconception that an upright torso and a neutral spine are the same thing.
Unfortunately, one of the biggest factors at play in the deadlift with respect to back pain, is how far away the bar is from your body. With a lighter load, it’s more common to see people let it drift away from them.
However, with a heavier load, that’s simply not possible. The bar has to stay closer to you.
*WARNING – This is down to you as an individual. If you have poor technique, I don’t recommend throwing on lots of weight to fix it. However, excessively lighter weights aren’t always the answer either. It’s simply about finding balance.
Not just because of simple biomechanics and alignment (fancy science) but muscles also have what is called intensity thresholds.
No intensity placed on them at all?
They won’t switch on.
Too much?
They’ll also switch off and basically run away hiding.

It’s about finding the sweet spot.
- People Don’t Respect Light Weight
This is also another huge factor when it comes to the relationship between load and technique and arguably the most important.
When using a lightweight, people tend to lose focus and neglect the finer points of their technique. However, when using heavier loads, you have no choice but to focus on the task at hand.
There is an old saying in the world of strength sports that you should carry through with you to every aspect of your strength training journey –
“Treat the lightweights like they’re heavy, and it’ll make the heavyweights feel light”.
Respect the exercise and the weight you’re lifting, whether it’s deemed easy or not.
Why Do We Break Under Load?
Now, obviously lifting heavy can also break your technique. And there are 3 main reasons for it –
Compensation
As we briefly mentioned – humans are task focused.
We are pre-programmed to focus first on the task at hand and only after that do we care about how it is achieved.
This means that if you have significant weakness in a muscle that should be performing the exercise, it will call upon another (often less suited to the task) to either help or do the job for it.
Although again there is individual variability, it is still important to note that some muscles are designed to be bulky, prime movers, whilst others are designed to be the smaller, more intricate synergistic muscles.
Injuries, muscle tightness/discomfort and occasionally pain, tend to occur when the roles each muscle is assigned to are all “outta sync”.
Strength training for beginners is largely based around understanding what muscles to use and when - rather than simply moving a weight from A to B.
For example, your adductors in the squat are supposed to be secondary muscles.
They help produce force, but they naturally aren’t anywhere near as big or strong as the glutes.
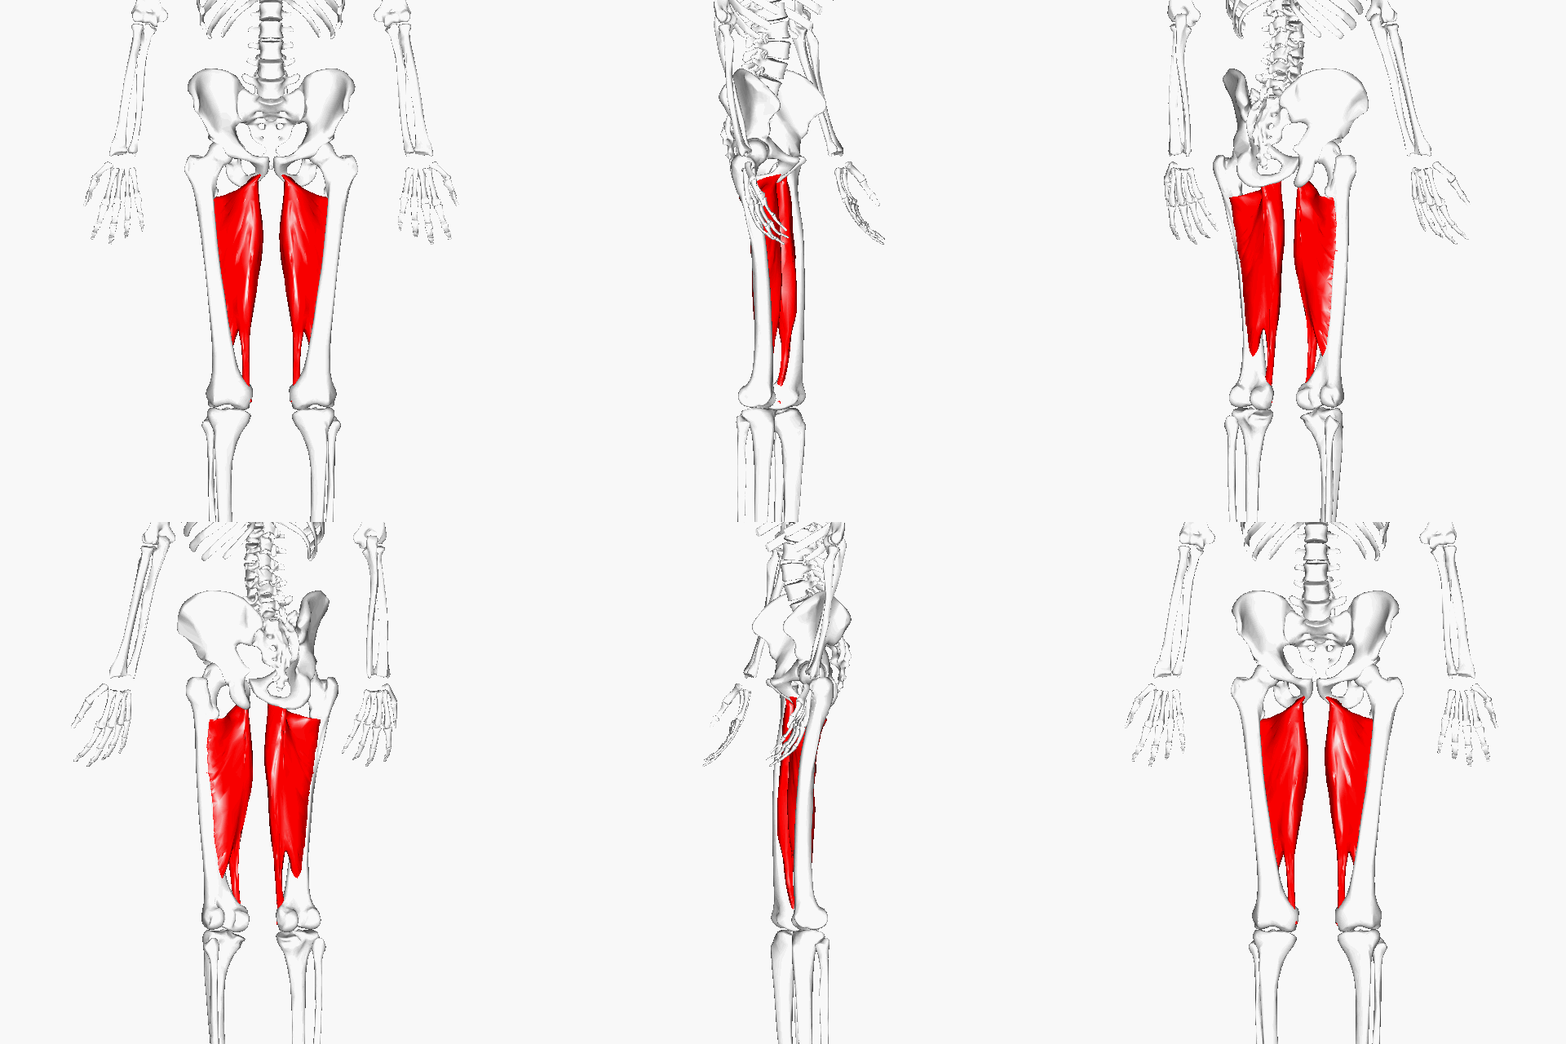
Yet if your glutes are really weak in comparison to your adductors, and you continue to squat with loads that are too heavy, the adductors will start to shift towards becoming a prime mover.
This is more likely to result in groin tightness, which then people tend to address by stretching, foam rolling and so on.
Although this helps, the majority of the time it’s purely down to weakness from another region.
Fear & Discomfort
Ever heard of fight or flight?
This psychosomatic (mental influencing your physical) response is ingrained within us. Some choose to fight the weight regardless (often leading to excessive compensation as mentioned earlier), whilst others subconsciously choose the flight path.

Whilst one isn’t necessarily better than the other, sometimes when asked to lift a heavyweight people become so fixated on how heavy it is, they forget all aspects of technique.
Neurological Inhibition – The “Flight” Side
Strength is heavily determined by the balance of excitation and inhibition.
Neurological inhibition is a fancy, scientific term for what is an involuntary, protective response our bodies possess, in order to prevent us from experiencing significant damage.
Try this test – Punch a boxing bag as hard as you can.
Good?
Right, now punch yourself as hard as you can. Even if it’s in your leg (not your pretty face), your body won’t let you put the same amount of force behind it – No matter how hard you try.
Another test – Run as fast as you can from 0 to 100m.
Good?
Right, now find some ice (go to an Ice Rink or wait for winter), then run as fast as you can on ice.
No matter how hard you try, your body will not let you push into the ground as hard on ice as you can on concrete.
This is because the body can sense when it is in imminent danger.
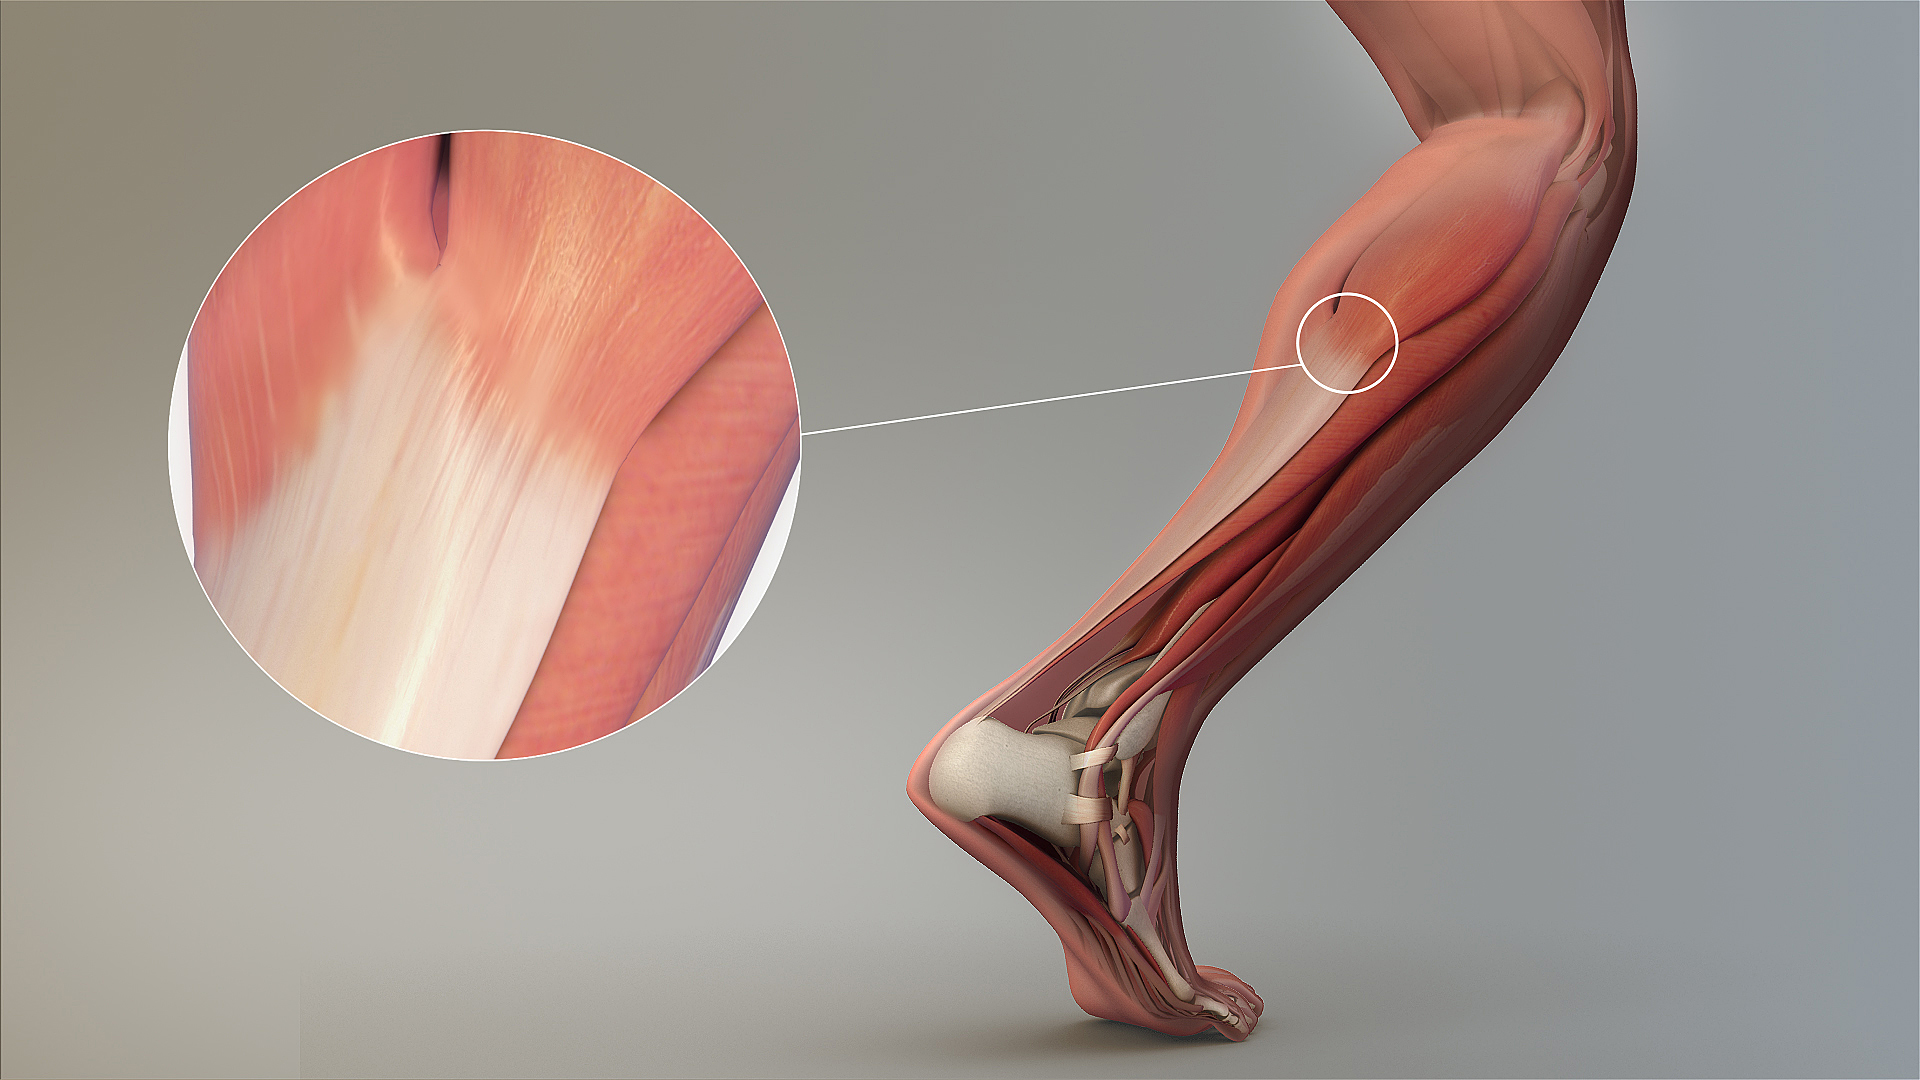
Now, this isn’t just “learned behaviours” with interactions with our environment. There are several protective mechanisms at play. For one example, when you lift a weight, small receptors in the tendons known as the Golgi Tendon Organ (GTO) that sense the amount of strain placed through the tissue.
If the strain becomes too great, it will literally switch the muscle off (also known as autogenic inhibition reflex), or in other words, prevents further contraction and stops you lifting (35). Simple. No arguing with it. Otherwise, if the strain were to continue to increase, the tendon may rupture – the last thing your body wants.
The Magic of Myelin
So, why are all the four pillars of technique important?
And the answer is simple –
Myelin.
Myelin is a fatty layer of insulation that wraps itself around a specific neurological pathway in the body, accelerating the rate at which signals can be transmitted.

In other words, it’s the thing that makes you technically good at something.
A great analogy I once heard was that myelination is the equivalent of converting a country lane into a motorway.
More traffic (neural signals) can drive at higher speeds to their destination (muscle tissue).
However, the insulation only occurs, if the technique is executed more or less the same way every time.
When performing the squat, where are your feet? Are they in the same position every time?
With all aspects of strength training for beginners, you should remember the following:
No exercise program in the world will allow you to out-lift/out-train poor technique. You might get by initially, but eventually, it will catch you up.
The easiest way to remember this, is that the body adapts to what it thinks is the most stressful task it has to perform.
For the average person, who probably hasn’t performed a deep squat with a safe and effective technique since the time they were a baby, their default motor pattern may be a bit dodgy.
A default motor pattern refers to the technique you employ, as a baseline.
Now when we teach you the best technique suited to you as an individual – introducing any of the 4 Pillars of Technique during strength training for beginners, your body wants to resort back to the default motor pattern.
When we are focusing on technique, we always want to strive to be better.
Perfection might not be possible but you should always aim for a safe and effective lifting technique, in every exercise you do.
The goal should be changing your default motor pattern into one that is fit for your body type, reduces your injury risk and allows you to develop the highest levels of strength.
CHAPTER TWO – 8 Key Exercises
Now on to the really fun stuff…
The exercises you need to perform to build the strongest version of yourself.
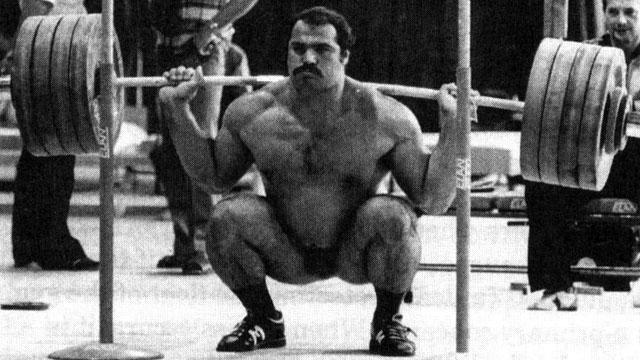
1. Full Depth Squats
Just a Few Examples =
- Front Squat
- Back Squat
- Goblet Squat
- Landmine Squat
- Bodyweight Squat.
The squat should be a fundamental aspect of your training.
This movement is relatively simple:
- Assume your squat stance, typically between hip to just outside shoulder width (or whatever feels most comfortable for you).
- Keeping your abs/stomach tight, bend the hips and knees at the same time whilst pushing your knees out to the side,
- Lowering your hips down to below parallel.
- Keep your chest up; hip, knee and ankle in line and your heels down throughout the course of the rep.
- Once you reach as low as you can comfortably go whilst maintaining tension, drive back up to the start position.
It’s also important to note – you might not be able to squat all the way down.
That’s fine to start with, but it should be an aim to work towards, with research reviews summarising full depth squats to be superior (7).
There has also been extensive research highlighting that increasing depth of the squat is superior for activation (6, 11) but it simply improves your mobility, making everyday tasks easier.
Common Mistakes and How To Fix Them
When learning this movement with strength training for beginners we want to look out for a few common mistakes:
Knee Valgus – “Knocked Knees” – this is where your knees get closer together throughout the movement, but your feet and body position remains more or less the same.
Fix = Plant your feet to the floor (gripping the ground) and push your knees out so they line up with your 2nd biggest toe.
Posterior Pelvic Tilt – More commonly referred to as ‘butt wink’, this is when your bum “tucks under” your spine in the bottom position. It’s a common sign for people that lack adequate mobility and do not engage their core.
Keeping your spine neutral and preventing butt wink is essential for preventing shear forces in the lumbar spine (9, 33).
Fix = Tighten up your abs as you squat down, check your hip and ankle mobility.
2. Hip Hinge
- Deadlift.
- Romanian Deadlift.
- Stiff Legged Deadlift.
- Kettle-bell Swing.
The hip hinge is the key to developing the strongest version of yourself – it’s a paramount movement for strength training.
Let’s take the deadlift as the staple hip hinge exercise, the movement is relatively simple:
- Stand with your feet hip to shoulder width apart, close enough to the bar so it runs in line with the arch of your foot.
- Root your feet to the ground, squeeze your glutes and brace your stomach/abs (imagine you’re going to take a punch to the gut).
- Sit your hips back as if you’re closing a set of drawers left open behind you.
- You should feel the weight drift to your heels until you feel tension in your hamstrings.
- Squat down to the bar, keeping the tension in your core and shoulders throughout.
- Grip the bar, and drive your chest out and head up slightly.
- Push through the ground through mid foot, extending the hips and knees simultaneously.
- Keep the bar close to the body.
- As the bar reaches your knees, drive your hips forward squeezing your glutes and abs hard.
- Lower the bar down to the ground under control and repeat.
A hip hinge is a primarily lower body movement pattern in which 70% of the movement comes from the hip joint and only around 30% comes from the knees; with research showing significant activation of the glutes, hamstrings and erectors when performing the deadlift exercise (4).
When comparing to the squat – think of the hip hinge as the hips travelling forwards and back. Versus the squat in which the hips travel up and down.
Although there are several variations that bring their own benefits, such as the sumo deadlift recruiting more quadriceps than the conventional (10) and most people being able to lift more with the hexagonal barbell (37) –
They all belong to the same group known collectively as – the hip hinge.
The number of chronic lower back problems I have encountered with my clients that is more or less exclusively caused by an inability to hip hinge. If you wanted a more in-depth look into the deadlift, head here to claim your free EBook – “8 Steps from Start to Finish”.
Just remember, the ability to effectively coordinate hip flexion followed by rapid extension is essential for health and performance in almost every single sport you could name.
Not to mention, there’s a pretty significant relationship between the hip and knee when lifting heavy loads – if the hip isn’t functioning properly, the knee takes up the slack (2).
Want to jump higher? Research has shown the deadlift to be an effective way of improving jump height directly (29, 39), with increasing jump height requiring more involvement of the hip joint (19).
Want to run faster? Research has also shown that increasing sprint velocity involves a greater moment at the hip (32, 43).
Common Mistakes and How To Fix Them
When learning this movement with strength training for beginners we want to look out for a few common mistakes:
Rounding your Back – “Snap City” – this is where your spine doesn’t assume or maintain a neutral position and instead you end up hunched over in a dodgy position.
Fix = Perform the exercise in the video below.
Squatting the Weight Up – “Lift with your legs” – this is where people confuse an upright torso with a neutral spine, meaning they avoid using their hips and instead try and lift exclusively with the legs. Unfortunately, this ends up using your lower back even more – as the weight is further away from the hip joint.
Fix = Perform the exercise in the video below.
Seriously – all you really need in strength training for beginners, in order to learn the hip hinge is this exercise.
3. Horizontal Push
- Bench Press
- Press Ups
- Dumbbell Press
- Chest Press
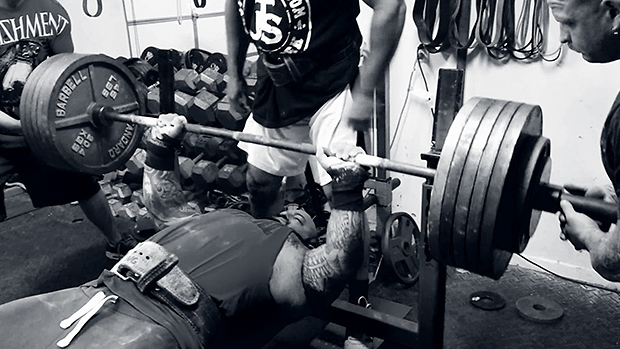
The horizontal push is essential to learn thoracic extension and control of the shoulder joint – plus, everyone wants a big bench press.
Let’s take the pressup as the king of horizontal pushing exercises during strength training for beginners, the movement is relatively simple:
- Kneel on all fours with the hands a little wider than shoulder width
- Straighten your legs out behind you so that your weight is distributed between your hands and toes, with your hands directly below your shoulders.
- Maintain a straight body throughout the exercise with your abs & glutes tight throughout
- Bend the elbows outwards to lower the chest towards the floor
- Push back up to the starting position.
The ability to effectively co-ordinate your scapula (shoulder blade) with your glenohumeral joint (what most people consider as the shoulder joint) is essential to prevent any limited movement in your thoracic spine (17).
With strength training for beginners, we oftentimes see a “kyphotic posture” being caused by internal rotation of the shoulder (hands turning inwards), combined with poor shoulder proprioception (12).
In addition, head and shoulder postural position has been shown to significantly influence scapular mechanics and muscular activity during overhead exercises (38), as we’ll see shortly!
In other words, if you’re walking around looking like Quasimodo from Hunch Back of Notre Dame, it’s probably down to your poor shoulder function.
Learn how to push things effectively and a lot of the time, those problems will disappear.
Common Mistakes and How To Fix Them
When learning this movement with strength training for beginners we want to look out for a few common mistakes:
Lower Back Arching – this is where we see an excessive curve in the lower back, as you get closer to the ground.
Fix = Pull your pelvis under, squeeze your glutes/bum and tighten your abs throughout the rep.
Elbow Bends/Half Reps – this is where people, simply don’t go down far enough, taking all the weight in their elbows and dipping their head towards the ground rather than lowering their chest.
Fix = Perform eccentric pressups (in other words, don’t lift your body back up – just lower yourself down) and focus on lowering your chest down before your hips.
4. Horizontal Pull
- Bent Over Row.
- Pendlay Row.
- Inverted Row.
- Seated Row.
The horizontal pull is essential to build a stronger upper back and a healthy set of shoulders – a strong back = a strong body.
Let’s take the bent over row as an example, an awesome horizontal pull exercise for beginners to strength training, the movement is relatively simple:
- Deadlift the bar up to the upright position.
- From the top position with the bar at arms length, sit your hips back, sliding the bar down your thighs until it reaches your knees.
- The bar should be directly beneath your shoulders – this is your start position.
- Holding this position, pull the bar in towards your stomach, drawing your elbows back past your body and squeezing your shoulder blades together.
- Return the bar to the start position and repeat for the allotted number of repetitions.
- After this, lower the bar down to the floor.
“Pulling” strength exercises involves a significant contribution from what is commonly referred to as the “posterior chain”. The posterior chain consists of large tendons, ligaments and muscle groups including the back, legs and hip musculature that are highly active during a variety of extension based tasks (8).
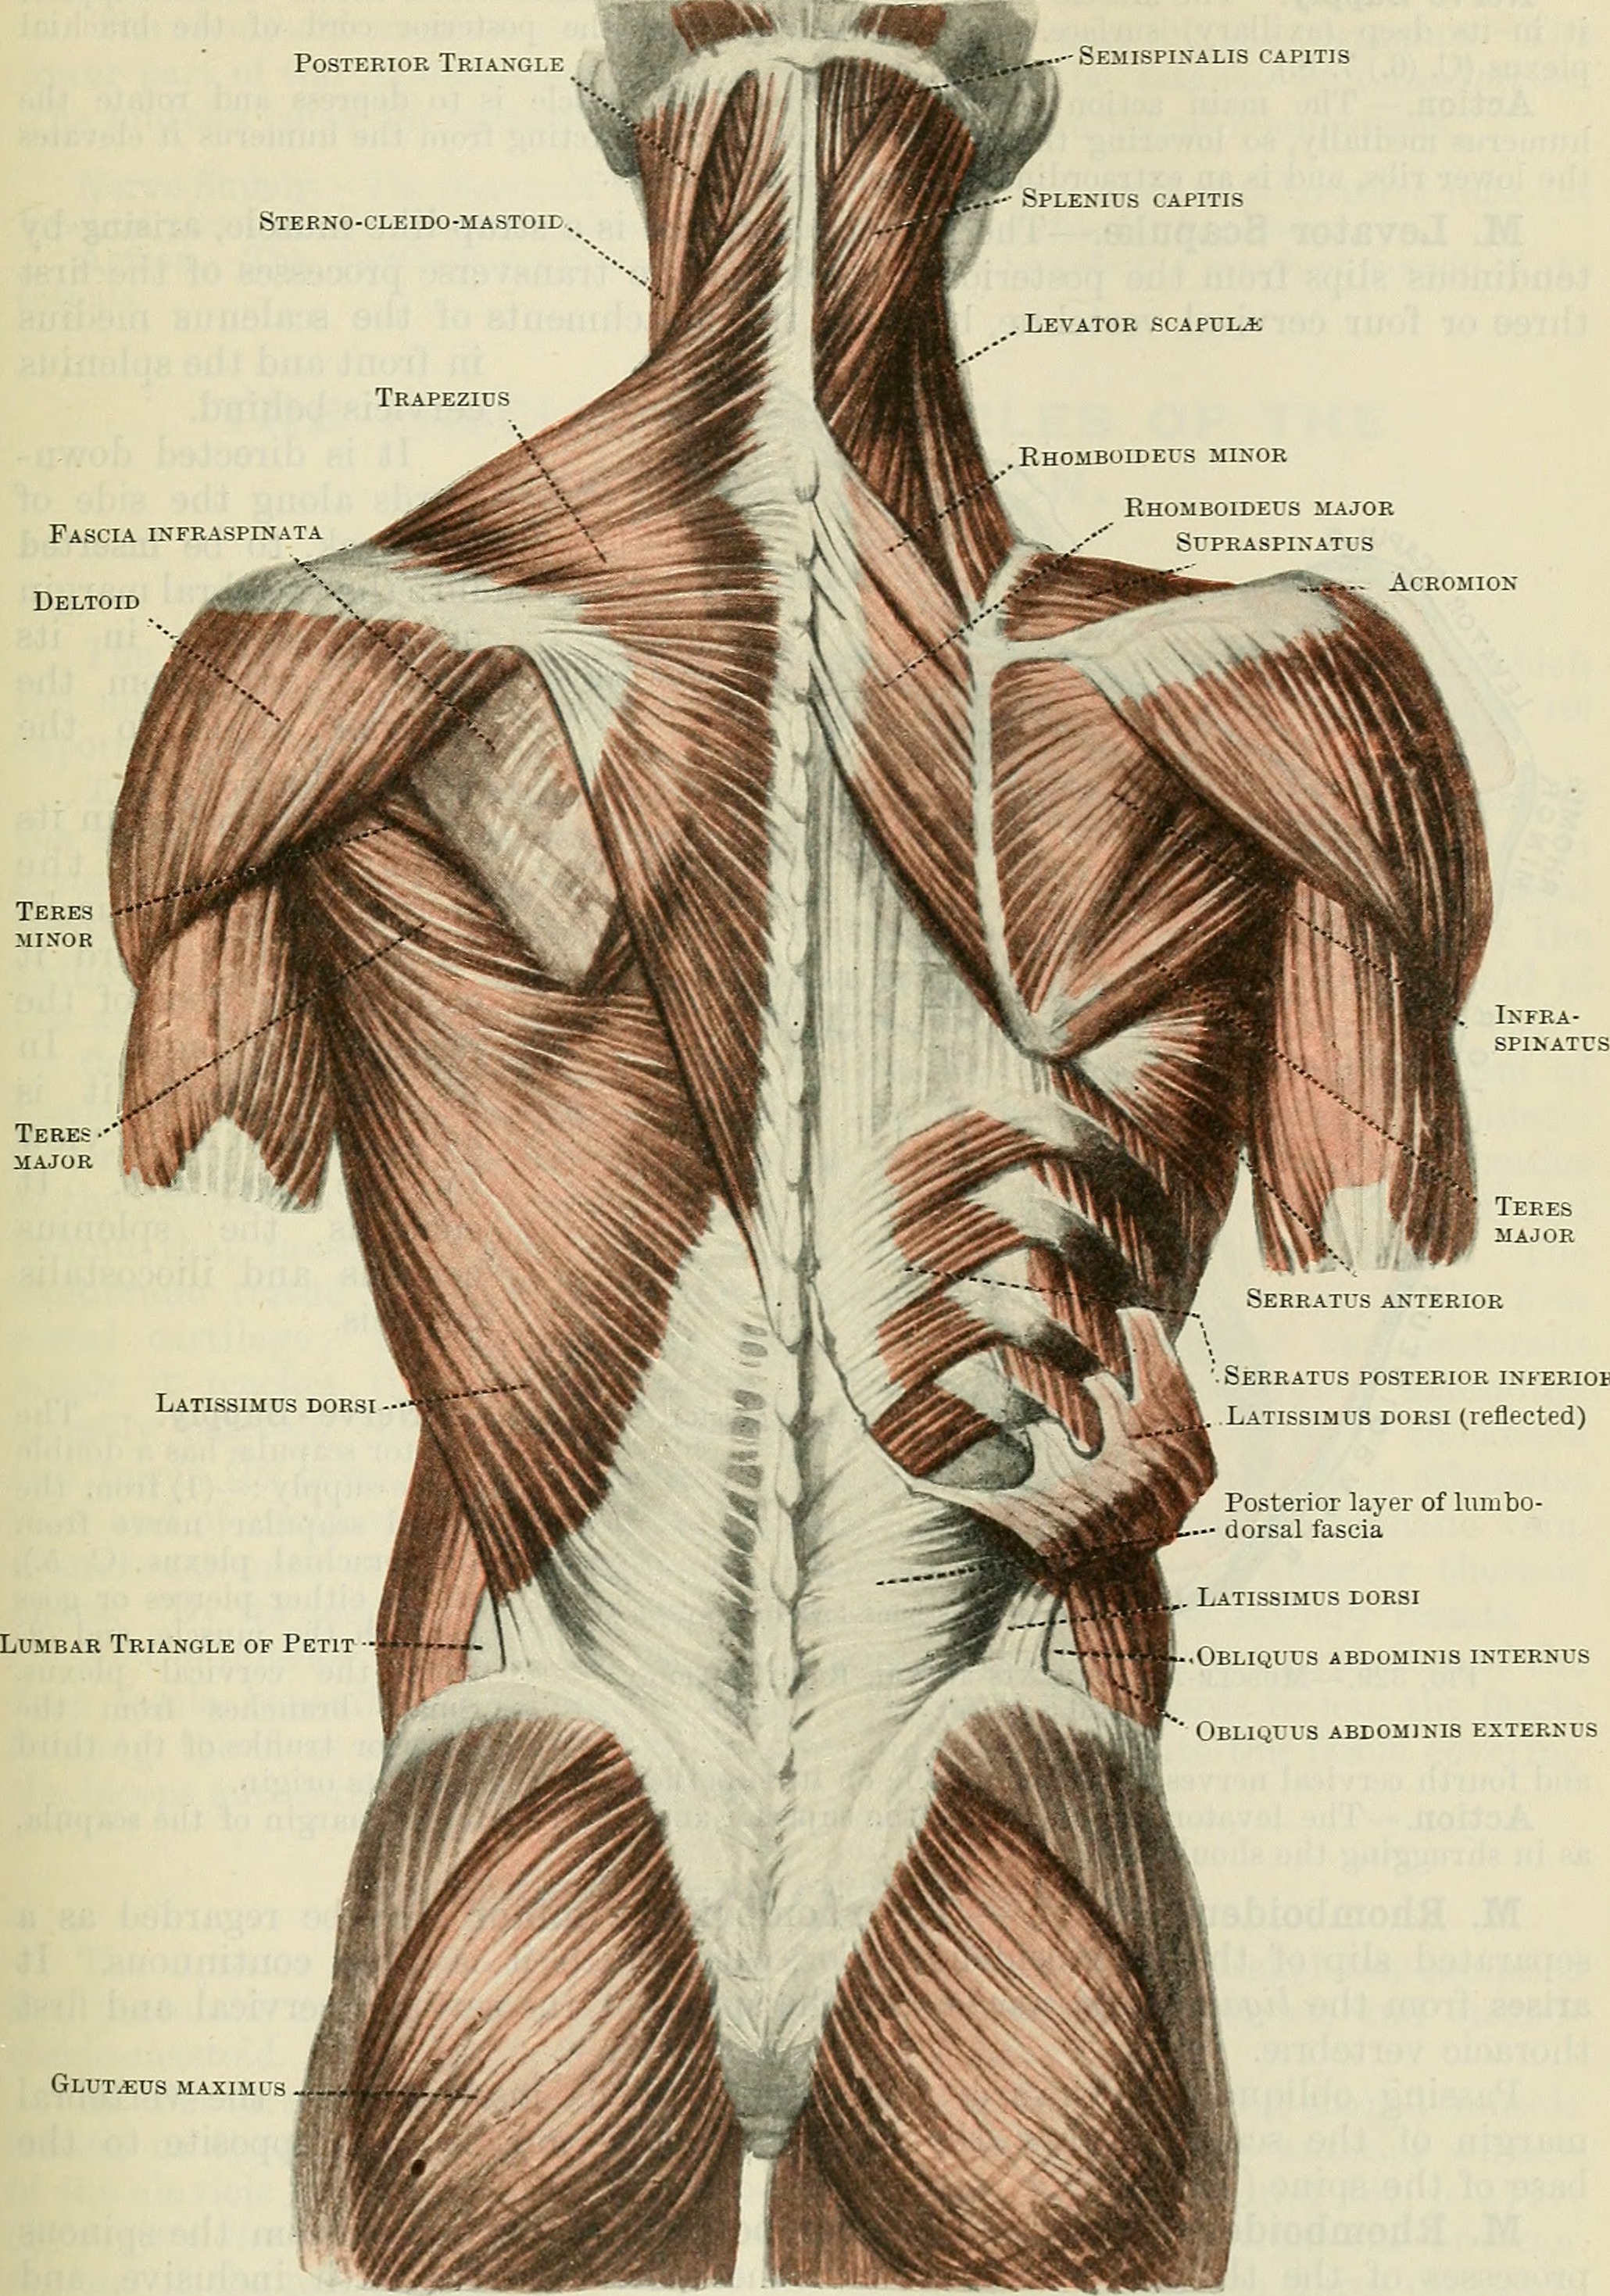
Research has also highlighted the importance of back strength in the prevention of lower back pain later in life (20). Combine this with an effective hip hinge and you’re good to train knowing you’re doing yourself a favour, not damage.
Due to society, nowadays, we spend a lot of our time sat down and relatively immobile, meaning this section of the body (particularly in your upper back) becomes significantly weaker, day by day. Neglecting your posterior chain musculature can significantly hinder your posture, mobility, flexibility and overall sporting performance (5).
Not only does the posterior chain have a significant role to play in health and the maintenance of good posture, but several sporting tasks are also dominated by the neuro-muscular contribution from this series of muscle groups (3, 14).
Common Mistakes and How To Fix Them
When learning this movement with strength training for beginners we want to look out for a few common mistakes:
Pulling with the Arms Rather than the Shoulders – this is where we see people pull the weight towards the body, but there is little to no movement of the scapula/shoulder blade.
Fix = Focus on pulling your elbows and shoulders back, rather than moving the weight. Imagine pinching your fingers in between your shoulder blades.
5. Vertical Push
- Military Press
- Push Press
- Dumbbell Press
- Arnold Press
- Handstand Pressups
- Log Press/Clean and Press
The vertical push is essential to build a stronger upper body – there’s nothing more challenging than taking the weight and pressing it overhead.
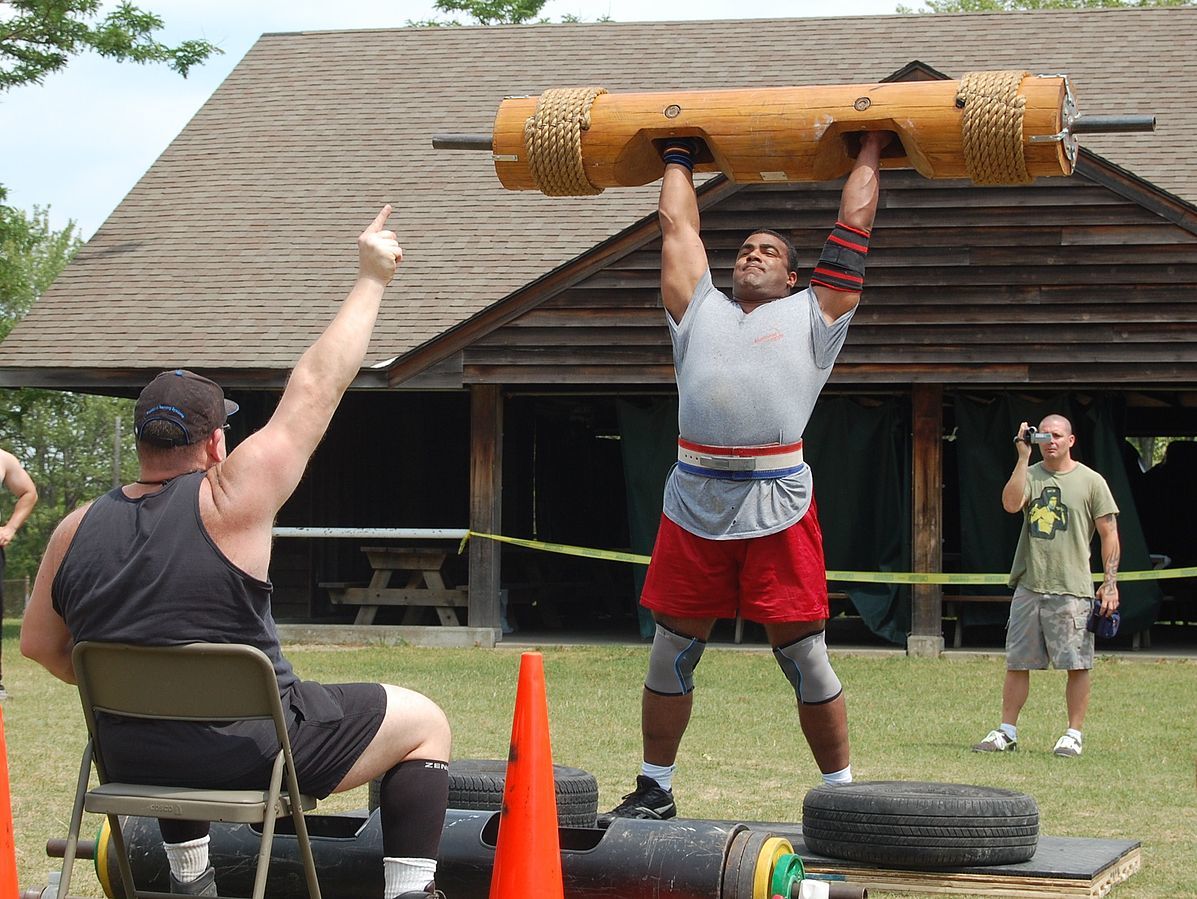
Let’s take the Military Press as the gold standard for vertical push for strength training for beginners, the movement is relatively simple:
- Set the bar at chest height in the rack.
- Assume a pronated (palms forward) grip with your thumbs wrapped around the bar.
- Unrack the bar on your chest, with your elbows beneath your wrists.
- Squeeze your glutes/bum, brace your abs/stomach and squeeze your elbows in tight to the side of your body.
- Press the weight overhead by pushing straight up.
- Tilt your head back slightly as the bar travels up, then push your head back through at the top of the rep.
- Aim to stabilise the bar over the midline of your body, then slowly lower back down to your chest.
Pressing weights overhead has been shown to build a huge amount of upper body strength (18) with a significant amount of activation in the upper trapezius and deltoids (26).
As with most exercises, there are dozens of variations that can be implemented – the main thing to keep in mind, is to ensure thoracic extension (keeping your chest lifted) throughout.
The major limitation you may find is your mobility reaching your arms overhead. Research has shown that when challenging shoulder range of motion (such as in a behind the neck press) less thoracic extension occurs (22) resulting in hunching over during the movement.
This can often cause shoulder pain and lead to impingement based shoulder injuries and decreased muscle strength (16).
With overhead pressing, make sure that you develop an adequate range of motion in the shoulder, before lifting excessively heavy.
Common Mistakes and How To Fix Them
When learning this movement with strength training for beginners we want to look out for a few common mistakes:
Thoracic flexion whilst pressing – this is where we see people hunching over as pressing the weight.
Fix = Improve your thoracic mobility using the following exercise (shown in the video below).
6. Vertical Pull
- Pullups
- Chin Ups
- Lat Pulldown
The vertical pull is essential to build a strong lats and increase upper back strength – remember a strong back = a strong body.
Let’s take the pullup as the ultimate vertical pull for strength training for beginners, the movement is relatively simple:
- Hanging from the pullup position using a narrow grip position, keep your abs tight and draw your shoulders down away from your ears.
- Squeeze your glutes and aim to generate tension throughout your body.
- Pull your chest up towards the bar, keeping your chest lifted throughout the repetition.
- Lower yourself down under control, keeping your shoulders away from your ears.
Being able to appropriately perform a vertical pull is essential for building a strong, healthy set of shoulders and is one of the keys to strengthening a pretty huge muscle – the latissimus dorsi.
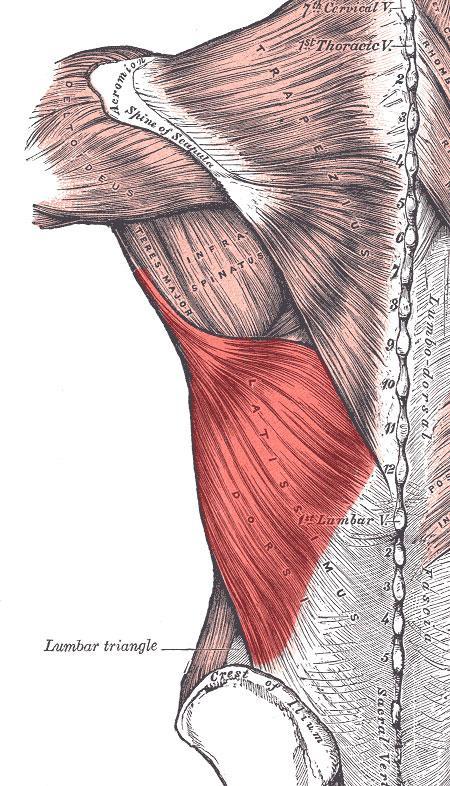
Vertical Pulling exercises also build your grip strength and have a huge carryover to other posterior chain exercises, such as the deadlift.
NOTE – Being able to do pullups can be quite challenging when strength training for beginners, so instead you can start out with the lat pulldown. Research has shown the two exercises to be similar in terms of muscular activation and overall improvements in the strength of shoulder musculature (15).
Common Mistakes and How To Fix Them
When learning this movement with strength training for beginners we want to look out for a few common mistakes:
Lifting The Shoulders/Relying on the Arms – this is where the individual is unable to maintain a proper shoulder position and thus, the shoulders “shrug” up towards their ears.
Fix = Don’t confuse length of the movement (i.e. A to B) with the range of motion – think of the cue – ‘keep my shoulders away from my ears’.
7. Lunge/Unilateral Work
- Lunges
- Split Squats
- Bulgarian Split Squats
- Lateral Lunges
The lunge pattern is essential to build coordination, core control and stability – there’s no use having a strong squat if you can’t even balance on one leg.
Let’s take the split squat as the basic first step to the lunge pattern in strength training for beginners, the movement is relatively simple:
- Stand with your feet hip to shoulder width apart.
- Take one step forward and one step back.
- Turn your hips and shoulders to be square on, facing forwards.
- Tighten your stomach/abs, bending both legs, lower the rear knee toward the ground.
- Focus on keeping your hip, knee and ankle (on the lead leg) in a straight line.
- Stand back up and lower back down again.
- Repeat on the opposite leg.
Being able to appropriately perform a lunge based exercise is essential for building stability in the lower body, building your core control and is one of the keys to improving your overall stability.
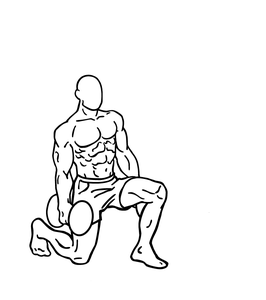
Unilateral lower body exercises are a great way of building coordination, but they also serve an additional benefit – you can overload your legs without having to load your spine in the same way.
Think about it, when you stand on one leg, you are essentially “doubling” the weight on that leg. This means you don’t have to add on as much weight to achieve the same level of overload through the lower body muscles – saving your spine for another day.
NOTE – It’s definitely not a bad thing to load your spine. When done correctly, it’s actually a good thing; with researching showing powerlifters to gain increase in lumbar spine and whole body bone mineral density (40).

However, loading your spine too early, particularly in strength training for beginners, can impact your recovery between workouts, meaning it takes a little longer before your body feels completely fresh again.
Common Mistakes and How To Fix Them
When learning this movement with strength training for beginners we want to look out for a few common mistakes:
Knee Valgus – this is where the knee of the front leg caves in OR your hips shoot off to one side.
Fix = Slow the movement down and focus on keeping the hip, knee and ankle of the front leg running in a straight line.
8. Loaded Carries
- Farmers Walk
- Suitcase Walk
- Yoke Walk
- Offset Carries
Let’s take the farmers walk as the gold standard, for loaded carries in strength training for beginners:
1. Stand with your feet hip to shoulder width apart
2. Hold a weight in each hand, directly by your side.
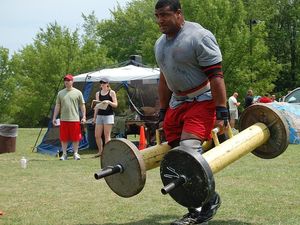
3. Reinforce a tall posture, by lifting your chest, tightening your lats and bracing your abs.
4. Walk forward one step at a time, focusing on keeping your legs shoulder width apart – do not let them crossover. And your feet pointing straight ahead.
On top of strengthening the glute medius (1, 36), increasing torso stiffness/rigidity (21) and improving ankle, core and pelvic stability (44), loaded carries are a great way to combine strength and conditioning, within the same exercise.
Common Mistakes and How To Fix Them
When learning this movement with strength training for beginners we want to look out for a two common mistakes:
Duck Walking – this is where the individual walking forward, but pointing their feet out to the side with each step.
Fix – slow the movement down and focus on keeping your feet pointing straight ahead. Imagine walking up a river of water at knee height. Sounds odd – but it works.
Crossing the Feet Over – this is where people have such a lack of stability in their hips, the load exaggerates the instability and as a result, they cross their feet over one another as they walk.
Fix – slow the movement down, focus on keeping your feet hip width apart as you walk.
CHAPTER THREE – Where Do I Start?
FAQs
No matter what the question, trust me… Its been asked before.
And better yet, if it hasn’t, leave it in a comment below and we’ll add it to the list!
[thrive_toggles_group”][thrive_toggles title=” What’s better, heavier weight for fewer reps, or lighter weight for more reps?” no=”1/1″]Good question, as is the case with most answers – it depends. It depends on a few things:
- What your goals are?
- What exercise are you referring to?
- How much experience do you have?
In each of these situations, the relationship between the weight you lift and the number of reps you do will change.
First off, your goals – if your goal is to build muscular endurance then typically, lower weight and higher reps will be more beneficial.
However, if your goal is maximal strength, it’s the other way around – heavier lifting and lower reps.
If your goal is to look good naked (as is the case with most), but you don’t want to become overly muscular, then contrary to what most people think, lifting heavier is actually your best bet.
The heavier your lift, the greater the involvement of the nervous system. There has been research to show that the hypertrophic (muscle building response) with lighter weights can be similar to that of lifting heavier ones when the total training volume is matched (24), however you don’t necessarily receive the same benefits of increased bone and connective tissue strength, greater neural recruitment and so on.
In terms of the specific exercise, I’ve written about how exercise complexity influences the rep number you should use before if you wanted a greater breakdown. But to put it simply – the more coordination involved, the lower the number of reps you should do for the weight.
So let’s say you can lift 40kilograms for 5 reps in one exercise. Then you pick a more advanced alternative and still find 40kilograms to be the weight you’re going to lift. The more phases involved, the less reps you should do in strength training for beginners per set.
When it comes to experience, again this is where things change slightly. Strength training for beginners should involve a focus on developing your technique. The more experienced you become, the more efficient your technique will be, the more you can push yourself.
I hope that answer helps![/thrive_toggles][/thrive_toggles_group]
[thrive_toggles_group”][thrive_toggles title=” Will I get ‘bulky’ from lifting?” no=”1/1″]To put it simply, no. It’s probably one of the most common misconceptions people have when it comes to weight training and is kind of like asking, “Will I look like a marathon runner if I run?”. If you take it to the extreme, appropriately structure your diet and train in a way that yields the most amount of muscle mass, then you can become bulky if you want to.
But as we’ve mentioned earlier in this article, there are several factors that contribute to strength – muscle mass is only one of them.[/thrive_toggles][/thrive_toggles_group]
[thrive_toggles_group”][thrive_toggles title=” Is heavy lifting going to damage my joints in the long run?” no=”1/1″]Another great question, it’s something I’m asked quite often. When it comes to extreme weightlifting, there is a certain fear around the damage it can do to the body.
However, when it comes to running, everyone is willing to accept the potential damage to the knees and other little niggles they may pick up along the way.
To answer the question – if you do it incorrectly, yes lifting can damage the joints. If you also compete at an exceptionally high level, then as with almost all competitive sports, yes, you risk damage.
However, when the load is appropriately managed, the technique is properly used for each exercise and longevity is kept in mind (i.e. not wanting to rush and remember that strength is a marathon, not a sprint), then strength training is actually the best thing you can do for your joints – to keep them healthy and functioning later in life.
There is an ever-growing amount of research proving this to be the case; with a recent critical review stating “strength training to show the greatest improvement for pain, disability and physical function when compared to other training methods (28). [/thrive_toggles][/thrive_toggles_group]
[thrive_toggles_group”][thrive_toggles title=” How do I include it into my current routine?” no=”1/1″]The beauty of strength training for beginners is that it can be implemented almost immediately and benefits felt within days.
I recommend for people to perform the basics of strength training for beginners (the 8 Key Exercises mentioned above) after warming up, in their current fitness plan. If left to the end, it’s often the case that it’s pushed to the side, or people are unable to do it effectively due to being so tired from the training they’ve just done.
Let’s say you train 3x per week, take 2-3 of the above exercises and perform 1-3 sets of each, following your warm up and before your main training routine.
Start light enough to be able to focus on your technique, but heavier enough to challenge yourself.
Once you’ve done this for a couple of weeks and felt the benefits, I can almost guarantee you’ll be digging for more answers on what more you can do. [/thrive_toggles][/thrive_toggles_group]
[thrive_toggles_group”][thrive_toggles title=” Do I have to go to a gym or can I do everything at home?” no=”1/1″]Technically no. Particularly when you first start out, a little bit of creativity and minimal equipment (such as a Kettlebell) can go a long way. However, if you continue on your Journey to Strong, you will reach a point in which you out-grow the typical confines of a home gym.
So, unless you plan on buying your own equipment and constructing your home gym (which is a perfectly viable option), I would recommend getting signed up to a gym that is kitted out with barbells, dumbbells and squat racks and having some fun![/thrive_toggles][/thrive_toggles_group]
[thrive_toggles_group”][thrive_toggles title=” What are the benefits of strength training?” no=”1/1″]This can (and will) take up an entire article in itself, but to put it simply, there is a quick list below, all supported by scientific research.
- Increased muscle size
- Increased muscle strength
- Increased bone mineral density
- Decreased injury rates
- An effective method for rehabilitation from injury
- Improved functional capacity in the elderly
- Improved metabolism
- Weight loss
- Increased confidence/decreased stress and anxiety.
The list is more or less endless!
[/thrive_toggles][/thrive_toggles_group]
[thrive_toggles_group”][thrive_toggles title=” Does strength training affect my mobility/flexibility?” no=”1/1″]Yes. But it actually improves your flexibility, provided you perform exercises with the complete range of motion. Research has actually shown strength training to improve flexibility to the same extent than static stretching (25).
In this instance, however, you’ve got to remember that there is a big difference between flexibility and mobility. People often assume them to be the same thing but there is a slight difference.
Flexibility refers to the range of motion in a joint during passive movement (i.e. if I lift your leg for you). However, mobility refers to a position that you can put yourself into (e.g. by squatting down low) or by lifting your arm overhead. In both instances, strength training can serve a benefit, however it depends on the individual. Strength training for beginners can tighten up areas that may actually be “too flexible”, as well as freeing up the more “immobile” among us. [/thrive_toggles][/thrive_toggles_group]
[thrive_toggles_group”][thrive_toggles title=” What is the best way to get strong?” no=”1/1″]Oh if I had a pound every time I’ve been asked this question – although it is a good one, it’s incredibly vague.
There are literally hundreds, if not thousands of combinations in strength training for beginners that will yield results. The concept known as periodization refers to the science behind structuring training. In essence, it’s the combination of different variables that make up an exercise program (such as exercise selection, time/tempo, training volume, frequency etc.)…the list goes on.
However, training to get strong (or better yet, physical training for anything) can be summarised in one sentence:
Component specific progression, best suited to the individual.
Training should be specific to the task at hand: If you want to get strong, you’ve got to lift heavy.
Training should be progressive: The definition of insanity is repeating the same task, expecting a different outcome.
Training should be individualised: It should be tailored to each person based off a few different variables such as enjoyment, ability etc.
So to sum up, no, there is no one best way. But so long as you abide by the laws of training, you can’t really go wrong. [/thrive_toggles][/thrive_toggles_group]
[thrive_toggles_group”][thrive_toggles title=” Do I need a personal trainer?” no=”1/1″]Not necessarily no. Even as a personal trainer, I’m not by any means saying it’s an essential aspect of getting stronger.
Having said that, there is an analogy I tend to use to describe the concept of having a coach.
Imagine you’re on a driving range, practising a golf swing. But you’re doing it in the pitch black. Each time you hit the ball, it disappears and you have no form of feedback or direction. It can be very similar to strength training for beginners.
A coach shines a light on the situation.
You could think you’re doing it correctly but the second pair of eyes is always helpful. [/thrive_toggles][/thrive_toggles_group]
[thrive_toggles_group”][thrive_toggles title=” How Should I breathe? ” no=”1/1″]I’ve written about this in detail before if you want to learn more about diaphragmatic breathing when lifting heavy.
There are 3 main times to think about breathing:
- Spinal Loading – This is where diaphragmatic breathing comes into play. With strength training for beginners, whenever you’re performing any kind of exercise that loads the spine (e.g. squat, deadlift, overhead press etc.) you should be utilising a diaphragmatic breathing pattern.
- When performing core work – You will notice that on certain exercises, you hold your breath. This is due to the diaphragm having a significant role to play in core stability. In other words, when it comes to challenging yourself in core exercises – you want to be breathing deeply throughout the movement to ensure your abs are really doing the work.
- Anything else – In more or less any other situation for strength training for beginners, it doesn’t make too much of a difference. The general rule of thumb is to exhale against resistance. I always recommend holding your breath, during the lifting phase and resetting at the top of each rep, but at this stage, it’s up to you. [/thrive_toggles][/thrive_toggles_group]
[thrive_toggles_group”][thrive_toggles title=” How much rest should I have between workouts?” no=”1/1″]Great question. It depends on a few things:
- Are you planning on training the same muscle groups? – If you’re planning on training the same body part in consecutive sessions, then I would always plan to have 24-48 hours rest in between them. This is primarily to allow the area to recover before you blitz it with more training – remember, you don’t get fitter or stronger in the gym, but when you recover. If, however you’re not training the same body part, you’re more than welcome to train consecutive days.
- Are you Exercising or Training? – It’s important to distinguish between exercising and training. Exercising can be viewed as something that doesn’t provide a significant amount of overload to any bodily system. It doesn’t necessarily have to follow any particular structure, it’s simply using your body. Training, however, follows the Law and the element of progressive overload taxes some of these systems which, in turn, need time to recover.
In either scenario, I would always advocate having 24 hours between training sessions to allow your body to rest.
Note – that doesn’t mean you can’t go to the gym, it just means you might want to hold back and how hard you push it.
It’s also important to remember that we base the majority of our planning of the 24 hour day and adhere to the Gregorian Calendar, yet our physiology doesn’t necessarily always work in those numbers.
In other words, training at 5pm on a Monday and then 8am on a Tuesday, isn’t the same as training at 5pm both days. The hours count, not just the day of the week.[/thrive_toggles][/thrive_toggles_group]
[thrive_toggles_group”][thrive_toggles title=” Should I train in the morning or night?” no=”1/1″]It’s simple – whatever suits you best. I’ve written about it in more detail here if you want to delve into the science behind it. [/thrive_toggles][/thrive_toggles_group]
[thrive_toggles_group”][thrive_toggles title=” Should I be sore after I train?” no=”1/1″]This topic is quite ambiguous.
If you look at the empirical, scientific evidence, the research suggests that muscle soreness is not an indicator of an effective workout and doesn’t necessarily have any positive influence on your improvements (34).
You can head here to learn more about the science behind muscle soreness.
In other words, just because you can’t walk the day after training legs, doesn’t mean it was a “killer session”.
Having said that, looking at the anecdotal evidence (i.e. the experiences of others), I’m yet to meet absolutely anyone who achieved the strongest version of themselves, without encountering some muscle soreness.
The difference is simply how much.
Most people actually like the slight tenderness, the common phrase is, “It really feels like it’s working”; and that’s completely normal. I’d be lying if I didn’t admit that I’m the same.
But being crippled for 4 days straight just because of an “awesome session” – it doesn’t work like that.[/thrive_toggles][/thrive_toggles_group]
[thrive_toggles_group”][thrive_toggles title=” What’s better, free weights or machines?” no=”1/1″]
This is a great question and one of my favourites.
It depends on a few different things:
- Your experience level
- Availability
- Confidence/Competence when performing strength exercises
- Muscle strength/imbalances
In the long run, free weights are always more beneficial and should be something you strive towards using.
They are more versatile, recruit more muscle and have a greater carryover to everyday movement.
However, that’s not to say that machines aren’t good for you. Machines require less skill to use, in other words, if you’re struggling to build your technique, machines can be a great way to start.
Plus, if you’re wanting to build a particular muscle, machines can be manipulated and used to focus specifically on one area, which is great if you’re wanting to correct any muscle imbalances. [/thrive_toggles][/thrive_toggles_group]
[thrive_toggles_group”][thrive_toggles title=” How long should I rest between sets?” no=”1/1″]Rest between sets is a great way of increasing the difficulty of a training session but be warned, it can have a bigger impact on your training outcome than you might realise.
It’s important to be aware that rest interval length is a training variable, meaning it influences the direction of your training results, in the same away changing the reps and sets does.
Research has shown, that shorter rest intervals result in a steady decrease in load lifted throughout the session (30), meaning less load was lifted throughout the course of the training session, but more metabolic stress was experienced. In comparison, longer rest intervals (of 3 minutes or more) help to preserve strength capacity over 3 sets (30).
So it depends what you’re after.
I always advocate the following in strength training for beginners:
“When you think you’re ready to go again, rest another 30 seconds”.
Fundamentally, if you finish a set, stop and 10 seconds later you’re ready to go again – it might be because you simply didn’t work hard enough in the 1st set.
Now, if this isn’t the case such as when you’re performing a newer, more complex strength training exercise, then you also need to remember – our attention (as in true, focused attention) tends to be short and snappy. You need to give your body and mind time to recover from the exercise you just performed.
Another way of combatting the rest issue is to perform a completely different exercise.
You can do one of the following:
- Perform an exercise with a different body part – for example, when you do a leg exercise, you could go straight into an upper body exercise without too much trouble. This only works if you’re not performing a full body strength exercise.
- Perform an exercise that isn’t physically challenging – for example, in the “Journey to Strong Program”, I always recommend performing a category of exercises known as “Movement Prep”. These are essential ‘coordination drills’ in strength training for beginners, that improve your technique, mobility and so on. These forms of exercises can easily be placed in the ‘rest between sets’. [/thrive_toggles][/thrive_toggles_group]
[thrive_toggles_group”][thrive_toggles title=” How often should I increase the load I’m lifting?” no=”1/1″]Another great question.
There are a few points we need to consider before we answer it:
- What exercise are we referring to?
Is it compound or isolation?
Which area of the body does it work?
What is your aim?
What is your experience level?
Different exercises progress at different rates. It depends on the constraints within the lift itself. For example, the olympic weightlifting exercises (advanced) require a minimum velocity for the lift to be executed at all.
Because of this, you can’t even hope of grinding out a rep. There’s no such thing as a slow snatch or clean.
Compound exercises progress much faster than isolation exercises and for good reason – they involve much more muscle. Compound exercises by their nature, result in more weight being lifted throughout the course of the exercise, which means there is a greater room for progression.
The area of the body has significant influence over how fast you can add weight during the exercise. The upper body simply involves less muscle mass when compared to lower body exercises and therefore, won’t progress as fast.
The aim of the exercise also determines the rate of progression. As strange as this may sound, just because you can increase the weight, doesn’t mean you should. There are several different ways of increasing intensity without adding weight to the bar (with just a few named here). You may be performing an exercise to improve muscular endurance, to improve coordination, stability and a whole host of other things – lifting heavier isn’t always the way you have to go.
As a general rule of thumb in strength training for beginners, I recommend the following:
2.5kg increase per week on lower body exercises; 1.25kg every week on upper body (13). [/thrive_toggles][/thrive_toggles_group]
[thrive_toggles_group”][thrive_toggles title=” Should women train differently to men?” no=”1/1″]To put it simply, they can, but don’t have necessarily have to.
I say this because women actually possess advantages over men when it comes to strength training for beginners.
Click here to read – Why Women Should Lift or here to read a bit more about – How Women Should Lift.[/thrive_toggles][/thrive_toggles_group]
[thrive_toggles_group”][thrive_toggles title=” How fast will I see progress?” no=”1/1″]Unfortunately, there’s no real answer to this question as there are simply too many variables at play such as:
- Genetics
Individual Response
Mindset
The right training program
Injury rate (prior to starting and/or during)
Time spent training
Proficiency of your technique when lifting
And so many more that unfortunately, the rate of progression is entirely individual.
However, it has to be said that effective strength training for beginners can and will provide you with faster results than you will have seen before.
In the world of lifting, it’s often referred to a “Beginner Gains” in which people see the fastest rate of progress they will ever see, within the first 8-12 weeks.
Although that isn’t strictly true for everyone it shows that anecdotally, people see huge leaps in strength when they first start lifting.
This is because, in strength training for beginners, such a huge portion of your progression comes from coordination, skill and familiarity with what strength training actually is. Research has shown that the first couple of weeks of progress can be attributed to learning what muscles not to use, rather than increasing the strength of the actual prime movers (42).
So regardless of how fast you progress, you’ll see improvements like no other. [/thrive_toggles][/thrive_toggles_group]
[thrive_toggles_group”][thrive_toggles title=” How do I know what weight to start off with?” no=”1/1″]A challenging one, that allows you to maintain a safe and effective technique. Again, this is entirely subjective to you as an individual. I know some people that were naturally, unbelievably strong, deadlift 200kg the first time they ever touched a barbell and then I know other people who couldn’t pick up a bar off the ground, who can now double their bodyweight.
I recommend using two tools to check the intensity:
- Rate of Perceived Exertion – This is a simple rating, on a scale of 1-10 on how difficult you feel the exercise was. For strength training for beginners, you don’t really want to exceed an 8/10. The weight itself will increase over time, but it should always feel like an 8 or less.
- Video or Coaching Feedback – Simply video your lift and speak to a coach (for example through a free consultation here on Strength Forge) and gain some feedback on whether that is an appropriate weight to begin with. [/thrive_toggles][/thrive_toggles_group]
[thrive_toggles_group”][thrive_toggles title=” Does fat turn to muscle? Or would my muscle turn to fat if I stop lifting? ” no=”1/1″]No. Although this sounds obvious, you’d be surprised how often this is still asked and as a result, it’s completely normal if you have the same question.
To put it simply, they’re two completely different tissues – the only confusion people have tends to come from an increased appetite that can come from really intense strength training for advanced strength athletes. Ceasing to train after this, doesn’t necessarily decrease their appetite, which is where the confusion comes from.
But no, it won’t. [/thrive_toggles][/thrive_toggles_group]
CHAPTER FOUR – Mindset + Progress
Twice the Results…Half the Time
Irrespective of the facet in life, efficiency and optimisation should be a key focus.
Why spend more time on a task, when you get twice the results in half the time?

Now this isn’t one of those, “Lose 40lbs of fat and gain 300lbs of muscle in 24 hours” kind of schemes; results take time and there are certain physiological limitations regarding the rate of progress.
However, there are a few hidden ways to optimise your time spent exercising…and chances are…you’re not doing them.
"Perfection is achieved not when there is nothing more to add, but when there is nothing left to take away"
Priorities
“It is vain to do with more what can be done with fewer” – William of Occam.
You don’t get any extra brownie points for getting the same results as one person, having spent twice the time in the gym.
WHAT IS TRAINING ECONOMY?
Training economy refers to the concept of gaining the maximal amount of results, in the shortest time possible whilst doing the least work required.
Time is a luxury; not something you always have in abundance.
And although this may sound like a lazy attitude, it couldn’t be further from. Just think, the less time you have to spend on one thing, the more time you have to spend on another.
Takeaway First
The biggest issue with training and the whole of the fitness industry nowadays, is that everyone is obsessed with adding the newest trick or exercise that promises newfound gains and this is often aimed in the world of strength training for beginners.
Whilst I’m all for trying to continually seek the answers and improve on what we already have, you would be much better to stick with the tried and tested methods to form the core of your training program, then look to experiment later.

80:20 Analysis
Instead, I urge you to just do a quick 80:20 Analysis of your current fitness program, based off a simple concept known as Pareto’s Law.
Pareto’s Law states that 20% of your efforts, produce 80% of your results (27).
In other words, there is a vast majority of your training that doesn’t necessarily contribute to directly to the bulk of your progression. There is a significant number of exercises that may simply be wasting time.
Look to your fitness program and ask yourself one of many simple questions…
- How much time do you spend on machines/cables vs. how much time you spend with a barbell and free weights?
- How many of your exercises involve 3 or more muscle groups?
- How much time do you spend resting, and could that time be used more effectively?
As you will read shortly, this is one of the reasons your “results” take such a long time to achieve. Before you read ahead, don’t think of what you’re going to add to your training.
First, take away the exercises that aren’t worth your time.
Now…I must preface this by saying that in the world of strength training for beginners, this is entirely contextual.
It will depends on your weaknesses, your goals and a whole host of others factors.
However, a key principle in strength training for beginners – maximise the time spent and get the most out of it.
Self Development Journey
We all want to feel progress, irrespective of where it takes place in your life.
When it comes to your fitness, it can feel like you’re running round on a metaphorical hamster wheel – never getting any further but knowing there will be problems if you step off.
You’re not actually going anywhere.
Strength training for beginners provides an unmatched platform for progression.
The feeling of progression is often the key to happiness. It creates the perfect balance of order and chaos...certainty and uncertainty...fear and excitement.
We all know that exercise is one of the greatest cures for almost all ills; including mental health .
If we combine the biological effects of exercise with the right structure and mindset – strength training for beginners can provide the vehicle for long-lasting fulfilment.
It sounds farfetched, but there is no other form of exercise that allows the for the same level of tangible, physical progression.
On top of seeing that you have physically lifted a heavier weight; a number that is greater than it once was. You will also notice that change in your everyday life.
From the elderly person struggling to get off the floor, to the 5-a-side champion who doesn’t want to “lose his youth” – strength training is for everyone.
References
- Bartlett, J. L., Sumner, B., Ellis, R. G., & Kram, R. (2013). Activity and functions of the human gluteal muscles in walking, running, sprinting, and climbing.American Journal of Physical Anthropology, 1(153), 124-131.
- Bejjani, F. J., Gross, C. M., & Pugh, J. W. (1984). Model for static lifting: relationship of loads on the spine and the knee.Journal of biomechanics, 17(4), 281-286
- Bennell, K. L., & Crossley, K. (1996). Musculoskeletal injuries in track and field: incidence, distribution and risk factors.Australian journal of science and medicine in sport, 28(3), 69-75.
- Bezerra, E. S., Simão, R., Fleck, S. J., Paz, G., Maia, M., Costa, P. B., … & Serrão, J. C. (2013). Electromyographic activity of lower body muscles during the deadlift and still-legged deadlift.Journal of Exercise Physiology Online, 16(3), 30-39
- Brown, S. R., Brughelli, M., Griffiths, P. C., & Cronin, J. B. (2014). Lower-extremity isokinetic strength profiling in professional rugby league and rugby union.International journal of sports physiology and performance, 9(2), 358-361.
- Caterisano, A., Moss, R. E., Pellinger, T. K., Woodruff, K., Lewis, V. C., Booth, W., & Khadra, T. (2002). The effect of back squat depth on the EMG activity of 4 superficial hip and thigh muscles.The Journal of Strength & Conditioning Research, 16(3), 428-432.
- Comfort, P., & Kasim, P. (2007). Optimizing Squat Technique.Strength & Conditioning Journal, 29(6), 10-13.
- De Ridder, E. M., Van Oosterwijck, J. O., Vleeming, A., Vanderstraeten, G. G., & Danneels, L. A. (2013). Posterior muscle chain activity during various extension exercises: an observational study.BMC musculoskeletal disorders, 14(1), 204.
- Delitto, R. S., & Rose, S. J. (1992). An electromyographic analysis of two techniques for squat lifting and lowering.Physical therapy, 72(6), 438-448.
- Escamilla, R. F., Francisco, A. C., Kayes, A. V., Speer, K. P., & Moorman 3rd, C. T. (2002). An electromyographic analysis of sumo and conventional style deadlifts.Medicine and science in sports and exercise, 34(4), 682-688
- Gorsuch, J., Long, J., Miller, K., Primeau, K., Rutledge, S., Sossong, A., & Durocher, J. J. (2013). The effect of squat depth on multiarticular muscle activation in collegiate cross-country runners.The Journal of Strength & Conditioning Research, 27(9), 2619-2625.
- Greenfield, B., Catlin, P. A., Coats, P. W., Green, E., McDonald, J. J., & North, C. (1995). Posture in patients with shoulder overuse injuries and healthy individuals.Journal of Orthopaedic & Sports Physical Therapy, 21(5), 287-295
- Haff, G. G., & Triplett, N. T. (Eds.). (2015). Essentials of strength training and conditioning 4th edition. Human kinetics
- Hawkins, R. D., Hulse, M. A., Wilkinson, C., Hodson, A., & Gibson, M. (2001). The association football medical research programme: an audit of injuries in professional football.British journal of sports medicine, 35(1), 43-47.
- Johnson, D., Lynch, J., Nash, K., Cygan, J., & Mayhew, J. L. (2009). Relationship of lat-pull repetitions and pull-ups to maximal lat-pull and pull-up strength in men and women. The Journal of Strength & Conditioning Research, 23(3), 1022-102
- Kebaetse, M., McClure, P., & Pratt, N. A. (1999). Thoracic position effect on shoulder range of motion, strength, and three-dimensional scapular kinematics. Archives of physical medicine and rehabilitation, 80(8), 945-950
- Kibler, W. B. (1998). The role of the scapula in athletic shoulder function.The American journal of sports medicine, 26(2), 325-337
- Kroell, J., & Mike, J. (2017). Exploring the standing barbell overhead press. Strength & Conditioning Journal, 39(6), 70-75
- Lees, A., Vanrenterghem, J., & De Clercq, D. (2004). The maximal and submaximal vertical jump: implications for strength and conditioning. The Journal of Strength & Conditioning Research, 18(4), 787-791.
- Luoto, S., Heliövaara, M., Hurri, H., & Alaranta, H. (1995). Static back endurance and the risk of low-back pain.Clinical biomechanics, 10(6), 323-324.
- McGill, S. M., McDermott, A., & Fenwick, C. M. (2009). Comparison of different strongman events: trunk muscle activation and lumbar spine motion, load, and stiffness. The Journal of Strength & Conditioning Research, 23(4), 1148-1161
- McKean, M. R., & Burkett, B. J. (2015). Overhead shoulder press–In-front of the head or behind the head?. Journal of Sport and Health Science, 4(3), 250-257
- Miletello, W. M., Beam, J. R., & Cooper, Z. C. (2009). A biomechanical analysis of the squat between competitive collegiate, competitive high school, and novice powerlifters. The Journal of Strength & Conditioning Research, 23(5), 1611-1617.
- Mitchell, C. J., Churchward-Venne, T. A., West, D. W., Burd, N. A., Breen, L., Baker, S. K., & Phillips, S. M. (2012). Resistance exercise load does not determine training-mediated hypertrophic gains in young men. Journal of applied physiology, 113(1), 71-77
- Morton, S. K., Whitehead, J. R., Brinkert, R. H., & Caine, D. J. (2011). Resistance training vs. static stretching: effects on flexibility and strength. The Journal of Strength & Conditioning Research, 25(12), 3391-3398.
- Moseley JR, J. B., Jobe, F. W., Pink, M., Perry, J., & Tibone, J. (1992). EMG analysis of the scapular muscles during a shoulder rehabilitation program. The American journal of sports medicine, 20(2), 128-134
- Newman, M. E. (2005). Power laws, Pareto distributions and Zipf’s law. Contemporary physics, 46(5), 323-351.
- Nguyen, C., Lefevre-Colau, M. M., Poiraudeau, S., & Rannou, F. (2016). Rehabilitation (exercise and strength training) and osteoarthritis: a critical narrative review. Annals of physical and rehabilitation medicine, 59(3), 190-195
- Olinghouse, K. D., Stock, M. S., Mota, J. A., Carrillo, E. M., Munayer, I. K., Shields, J. E., … & Thompson, B. J. (2014). Effects of a ten week barbell deadlift training program on vertical jump height in college-aged women. InInternational Journal of Exercise Science: Conference Proceedings (Vol. 2, No. 6, p. 72)
- Ratamess, NA, Falvo, MJ, Mangine, GT, Hoffman, JR, Faigenbaum, AD, and Kang, J. (2007). The Effect of rest interval length on metabolic responses to the bench press exercise. Eur J Appl Physiol. 100: 1-17.
- Rossi, S. J., Buford, T. W., Smith, D. B., Kennel, R., Haff, E. E., & Haff, G. G. (2007). Bilateral comparison of barbell kinetics and kinematics during a weightlifting competition. International journal of sports physiology and performance, 2(2), 150-158.
- Schache, A. G., Blanch, P. D., Dorn, T. W., Brown, N. A., Rosemond, D., & Pandy, M. G. (2011). Effect of running speed on lower limb joint kinetics. Med Sci Sports Exerc, 43(7), pp.
- Schoenfeld, B. J. (2010). Squatting kinematics and kinetics and their application to exercise performance.The Journal of Strength & Conditioning Research, 24(12), 3497-3506
- Schoenfeld, B. J., & Contreras, B. (2013). Is Postexercise Muscle Soreness a Valid Indicator of Muscular Adaptations?.Strength & Conditioning Journal, 35(5), 16-21
- Sharman, M. J., Cresswell, A. G., & Riek, S. (2006). Proprioceptive neuromuscular facilitation stretching. Sports medicine, 36(11), 929-939
- Stastny, P., Lehnert, M., Zaatar, A., Svoboda, Z., Xaverova, Z., & Pietraszewski, P. (2015). The gluteus medius vs. thigh muscles strength ratio and their relation to electromyography amplitude during a farmer’s walk exercise. Journal of human kinetics, 45(1), 157-165
- Swinton, P. A., Stewart, A., Agouris, I., Keogh, J. W., & Lloyd, R. (2011). A biomechanical analysis of straight and hexagonal barbell deadlifts using submaximal loads.The Journal of Strength & Conditioning Research, 25(7), 2000-2009
- Thigpen, C. A., Padua, D. A., Michener, L. A., Guskiewicz, K., Giuliani, C., Keener, J. D., & Stergiou, N. (2010). Head and shoulder posture affect scapular mechanics and muscle activity in overhead tasks.Journal of Electromyography and kinesiology, 20(4), 701-709
- Thompson, B. J., Stock, M. S., Shields, J. E., Luera, M. J., Munayer, I. K., Mota, J. A., … & Olinghouse, K. D. (2015). Barbell deadlift training increases the rate of torque development and vertical jump performance in novices.The Journal of Strength & Conditioning Research, 29(1), 1-10
- Tsuzuku, S., Ikegami, Y., & Yabe, K. (1998). Effects of high-intensity resistance training on bone mineral density in young male powerlifters. Calcified tissue international, 63(4), 283-286
- Vøllestad, N. K. (1997). Measurement of human muscle fatigue. Journal of neuroscience methods, 74(2), 219-227
- Walker, S. (2019). Neural adaptations to strength training. Concurrent Aerobic and Strength Training: Scientific Basics and Practical Applications
- Wiemann, K., & Tidow, G. (1995). Relative activity of hip and knee extensors in sprinting-implications for training.New studies in athletics, 10, 29-29
- Winwood, P. W., Cronin, J. B., Brown, S. R., & Keogh, J. W. (2014). A biomechanical analysis of the farmers walk, and comparison with the deadlift and unloaded walk. International Journal of Sports Science & Coaching, 9(5), 1127-1143


